Google Search

Custom Search

Monday, February 1, 2010

Making a contact form

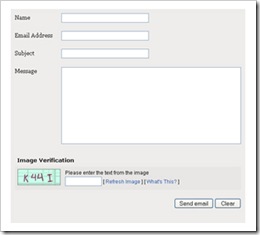
contact-form A few days a go, after Kang Rohman wrote about Contact Us in this blog, there are many e-mails that ask on how to make a contact form like this blog’s contact form. Hmmm..do I still remember it? I think I forget because I didn’t write the steps when I was making it. Well, readers, just a minute and let me remember it ok clip_image001

Before adding the contact form in your blog, it is better for you to consider the good things and bad things of adding the contact form. One of the good things of adding contact form is to ease the visitors to send you e-mails. And the bad things about it are people or your visitors are easy to send you e-mails. The consequence is that you have to be ready to receive a lot of e-mails in your inbox and spare your time to answer their e-mails, right? In this opportunity, Kang Rohman also would like to say sorry if Kang Rohman haven’t been able to respond your emails because Kang Rohman don’t have much time to respond all emails in Kang Rohman inbox.

Where can we gat Contact Form? In the Internet, there are many websites that give this facilities. Some websites give free facilities but some give free facilities. And as a future fortune teller, Kang Rohman knows that you want the free one, don’t you?

The free contact form can be found in http://www.emailmeform.com, http://kontactr.com, http://www.zoho.com and many others. The contact form of this blog is taken from http://www.emailmeform.com, so I will give the tutorial about the contact from this web.

And below are the steps to make the contact form:

  1. Please, visit http://www.emailmeform.com.
  2. Drop your eyes to the right side of the monitor
  3. Click Sign up for free
  4. Fill the form available with your personal data:

    First Name : » fill with your first name, example : jaka.

    Last Name : » fill with your last name, example : tingkir.

    Username : » fill with your user name. example : jaka25.

    Password : » fill with your username, example : juralitjungkel.

    Retype Password : » fill with your username again, example: juralitjungkel.

    Your Email : » fill with your email, example: jakatingkir25@yahoo.com.

  5. Click Sign up.

  6. Website will thank for using their facilities and ask you to check your e-mail you use when signing up for e-mail verification.

  7. Open your e-mail from EmailMeForm. The email shows your new account information.

  8. Click the link given or copy the URL to the address bar browser internet to verify that it is your email.

  9. After the verification process, click the writing click here to go to your control panel account.

  10. Drop your attention to the right side of the monitor and click Create new form.

  11. Here, you should fill in some forms

    Web form Name : » fill with your name, or ignore it (it is already Contact Webmaster).

    Recipients Emails : » fill with the e-mail which will receive the messages.

    Spam Email address : » fill with the e-mail which will receive spam e-mail (junk, ads e-mails or others) or just let it blank if you don’t want to receive spam e-mails.

    Thank you page : » fill with URL address that will contain “Thank You”, example; click this post to see the sample or just write your blog URL if you are confused.

    Number of fields : » don’t change, just keep it 4.

  12. Click next on the right of the web

  13. You should change some filed names as you want, such as; your name becomes Nama, your e-mail address becomes alamat e-mail, etc. Or you can keep them original.

  14. Click next on the right of the web

  15. Click next again

  16. Please fill with your interest ( wow..it is tiring to explain this one) or skip it.

  17. Click next again

  18. Click next again

  19. The web will show the sample of contact form that you have made.

  20. Click finish

  21. Click Get the HTML codes

  22. Copy the code in text area, under the writing Copy and paste this HTML code into your page. The paste them into notepad or other text editors.

  23. finish

To make a contact form, you only need to make a new post as usual, change from compose menu into HTML menu, then paste the code of EmailMeForm you save in notepad or other text editors and finally click publish. That’s it. Now, you have Contact Form in your blog.

Good luck, my readers!

Making A Scroll Function In A Page Element

In this bright day, it would be happy for me to respond one of the questions from the reader of Kang Rohman’s blog. The question is about “How to make a scroll function in a page element, like a scroll function of Blogging Tutorial For Beginner element at the bottom of this blog?”. I can say that the answer is very simple because we don’t have to make a lot of HTML code to make it. We only need a few HTML codes. If you are still curious to make it? Just read the tutorial below to understand what I mean…ok?

To make such kind of page, you only need to make the following code:

What you want place here!

Sample :


And here is the result:

Let me tell you about them so that you really understand. In the code above, Style code has a big role, why? Because we can make and create anything we want with Style. Below are the orders we use to make the scroll function.

overflow:auto; » this code is used to make a scrolling page if the content of the page has reached the defined highest and widest limit.

width:300px; » it is used to define the width of the scrolling page. In this case, 300 pixel. This value is matched with the width of scrolling page you want and also matched with the width of sidebar. But remember that you ought to use 100% to match with the width of the sidebar. (width: 100%)

height:200px; » it is used to create the height of the scrolling page. You can change the height as you want, such as 250% or others.

padding:10px; » it is used to make the distance between the writing or content of the scrolling page and the wall of the scrolling page or you use this code in order not to make the writing or content of the scrolling page touch the page of wall. You can change this code as you like, such as; padding; 5px.

Border:1px solid #eee » it is used to make the box of the scrolling page, if you don’t want to use it, just erase it.

Beside the codes above, you can also add any kinds of variation as you want, for example; picture background, different fonts or any other variation.

The contents of the scrolling above aren’t only for links, like Kang rohman’s links but also for ordinary writing, images, ads or others.

Are you still confused to put the code above? Take it easy my readers, as usual, go to blogger dashboard » layouts »page element » Add a gadget » select JavaScript/HTML » put in the code » save and finish

Have a nice experiment my readers!

Navigation Tutorial: Dynamic-FX Slide-In Menu (V6.5)

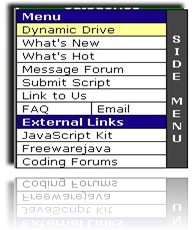
slide in menu A few days ago, my friend Wizurai asked kang rohman to giving tutorial how to create menu in his blog, because there were many friends who wanted to know how to make such menu. Okay, kang rohman is giving the tutorial now.
The Menu found in the my friend Wizurai ‘s blog is called Dynamic-FX Slide-In Menu (v 6.5), The original source code and the sample of that menu can be seen at dynamicdrive.com. Why Dynamic-FX Slide-In Menu (v 6.5) is unique? Because the menu or navigation is hidden in the left side of the monitor screen, and we can see only the bar menu, but when it is pointed by the computer mouse then the menu will appear. The most interesting thing is how that menu will move according to the scrolling movement, so that it will always be seen at the left of the monitor screen.


If you are interested in making that kind of menu in your blog, you can follow the tutorial written below:
Please download first the source codes that will be used later. Click the image below:

download here!

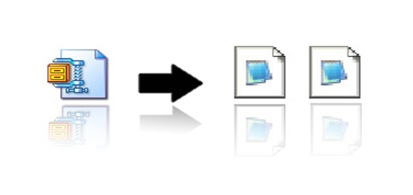
After you have downloaded the file, you should have extracted it in a zip file (winzip, winrar)

ekstrak

When the file had been extracted, it will produce two java script files as we can see on the above illustration The two java files have the names ssm.js and ssmItems.js . Before you upload those files to the file server, you must edit first the ssmItems.js file, that is to replace the existing links with the links you wanted to save in that menu. How to edit that file? Here you have to use notepad. The steps are as follow:

  1. Click the right button of the mouse on the file named ssmItems.js, choose open with, and then choose notepad, because we use the notepad software.
  2. After this first step, you will see the file like this :


  3. Change the red codes with your option codes (in the uploaded files).
  4. Click the SAVE TEMPLATE button.
  5. Finish. Please look at the result.

Wow…..you can do it!

Congratulation!

Tips To Delete the Image Border

Hello, Friends, when do you often insert an image, when you are posting in your blog?, like this .

Sometimes we feel bother with the border of the image, for example


or


If you want to delete the border of the image, you can follow the following instruction.

  1. Login into blogger with your account
  2. Click Layout
  3. Click Edit HTML tab
  4. Click Download full template, and please backup your template first
  5. Find the similar code below in your template.


    .post img {
    padding:4px;
    border:1px solid $bordercolor;
    }

  6. Delete this code line

    border:1px solid $bordercolor;
  7. Click Save template
  8. Finish

It is easy, isn’t? Now if you insert smile in your posting, trust me that there won’t be any image border again.

See you in my next posting

Adding Smiley in Shout box

Have you even seen funny and miracle heads below?

Emoticon

For you who sometimes or often write in the guest book of this blog won’t surely be surprised with the funny and miracle heads anymore. Do you know what they are? Smiley or emotions. Yes, you are right, they smiley or emotions. All smiles or emotions belong to Shoutmix which are saved in the guest book facilities.

After writing some comments, the guests usually add a smiley or an emotion. Emotions or smiles in the guest comment of in the guest book will show the character of commentators or guests. But not all emotions or smiles really represent their characters because some commentators or guests like to pretend to have such kinds of characters.

Now, what about you? Would you like to add funny and miracle heads above? If you want to add them, you will able to do it easily. For example, you want to add this kind of head clip_image001 , this one clip_image002 or even more extreme emotions, like this clip_image003. Actually, those heads can be placed in the our Shoutmix as long as we know the image address of them.

If you really like emotions of yahoo messenger, you can see the image address here! what you need is only their image address. For examples, to show this emotionclip_image004, you should use this code


The code we need is only the following code;

http://us.i1.yimg.com/us.yimg.com/i/mesg/emoticons7/14.gif 
 

Would you like to know how to add smiles or emotions in your Shoutmix or guest book? Just keep being here and reading the steps of this tutorial…ok

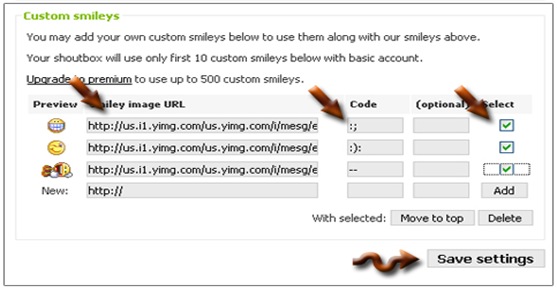
Login into Shoutmix with your username and password.

  1. At Display menu, click Smiley
  2. Add your desired image URL in the box under “Smiley image URL”
  3. Change the characters which are located under the code with the different ones, for example with the character like this “))” or with all your desired characters.
  4. Click Add button next to them
  5. Don’t forget to add the other smiles or emotions if you still want to add more and make sure to click Add button.
  6. Click Save Setting button
  7. Done.

smiley_03

If you have done all the steps above, the smiles or emotion characters will automatically be added in your guest book or Shoutmix without changing any code in our template any more.

Ok, now your guest book or Shoutmix has many emotions, like thisclip_image005clip_image006clip_image003[1].
Good Luck!!!


Followers

Bloging Tricks Copyright © 2009 Blogger Template Designed by Bie Blogger Template